Even if you never thought about having a blog or being a “blogger” maybe you should have. If you want to be in business for yourself in any way you will need to have a website. From my experience running WordPress from Bluehost hosting works the best. Plus you can
You might think well I can just get a free blog spot site or use Facebook or YouTube. That is of course something that you could do, but there is a downside. If you use these platforms you don’t have control and full ownership of your content.
If they decide that they want to take down your content they can do that. Your business could be taken down without a moment’s notice. This is why it is important that you have complete control and ownership of your content.
Making Money
If you want to make money having a paid hosted site is a necessity. Many advertisers won’t work with someone who uses a free site. Social media sites change there rules and algorithms and what you were doing to make money suddenly won’t work.
Even if you are using the site to sell your own products, whether digital or physical, you will still benefit from having a website that you fully control. A Bluehost hosted site will allow you to grow your business and make changes in time as all businesses grow and change. At least your hosting doesn’t need to change.
What you should know about Bluehost
- They offer 24/7 tech support – Have a question and they have you covered
- You’ll get a free domain when you get your first hosting plan
- The 1-Click WordPress install is free through Bluehost
- You get free SSL with each site to secure your site visitors.
- They offer a 30-day money back guarantee. If it’s not right for you just let them know.
- Just so you know there are renewal fees for the domain and hosting. So if you plan on doing this for a while get the longest plan you can at the introductory rate. The price will be higher on renewal. As with everything!
- It grows with you. You start on shared hosting and as your site gets more traffic you can change the hosting that you get to work with it.
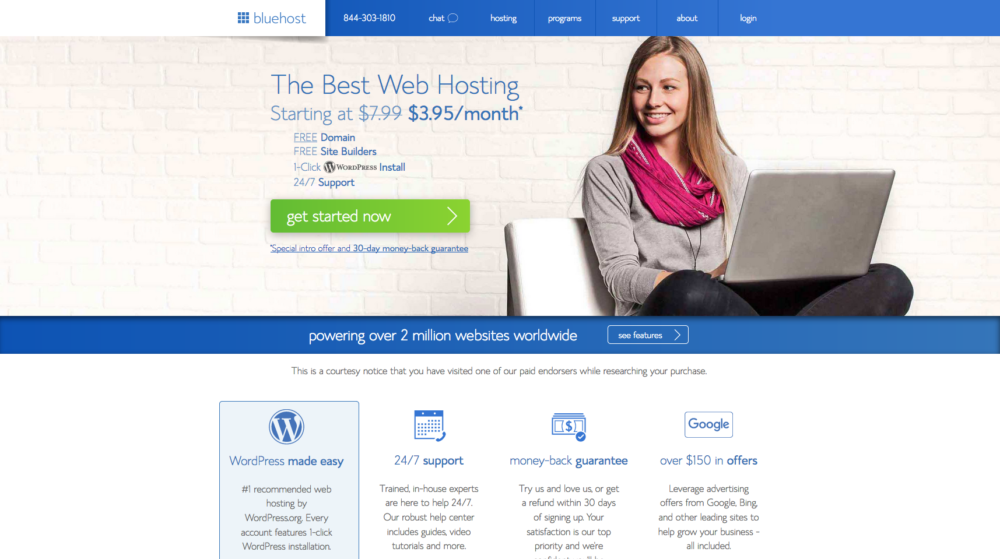
1 Pick Your Domain Name
The first thing that you need to have is a domain name. If you already have a domain through somewhere else you can enter that domain when you get started. If you don’t own one you can get your free Bluehost one when you get started or you can choose to pick the domain later.
2 Pick Your Plan
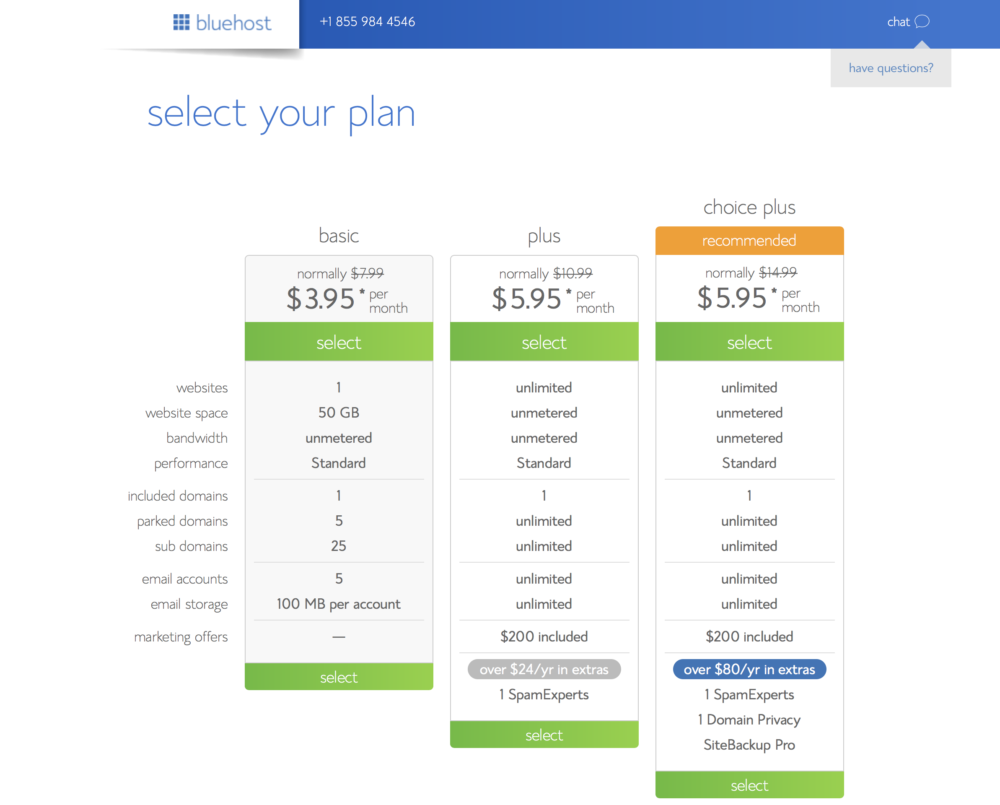
When you are just starting out you likely won’t need anything other than the basic plan. While there is still a great price on the other plans, they have features that you likely don’t need for now. Although I will say that the “Prime” plan has Domain Privacy. This is a feature that will keep your personal information private and that is a great feature to have. Select the plan that you want and move onto the next step.
3 Enter Your Domain
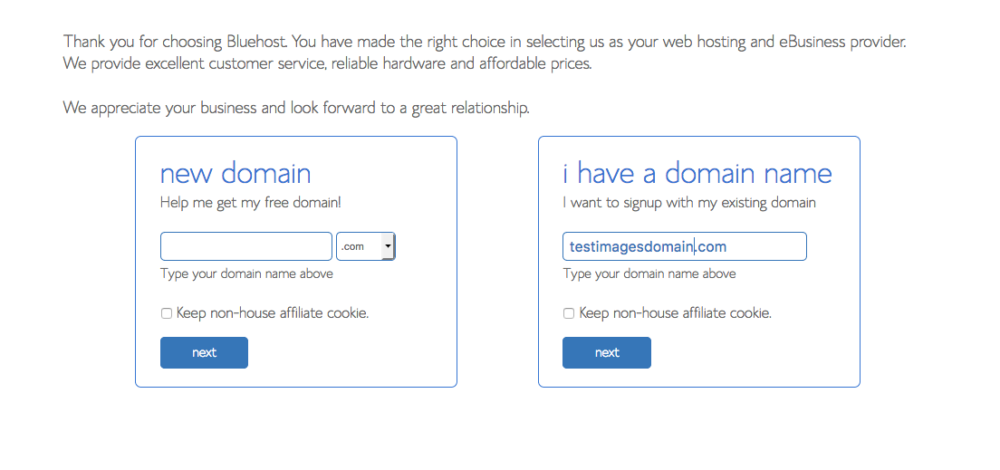
If you have your domain from another provider or have decided on a new one, this is the time to enter it. If you don’t have one and still can’t decide you can pick the “Choose Later” link. There is nothing wrong with waiting if you haven’t decided on the best domain name. A bad name could hurt your business.
4 Pick Your Plan Terms
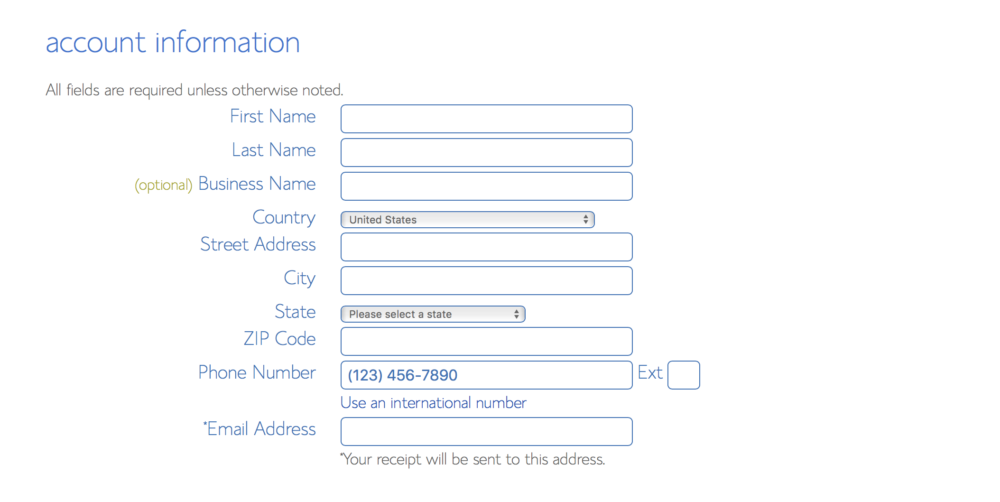
Just enter your name & business name (if applicable), address and email address.
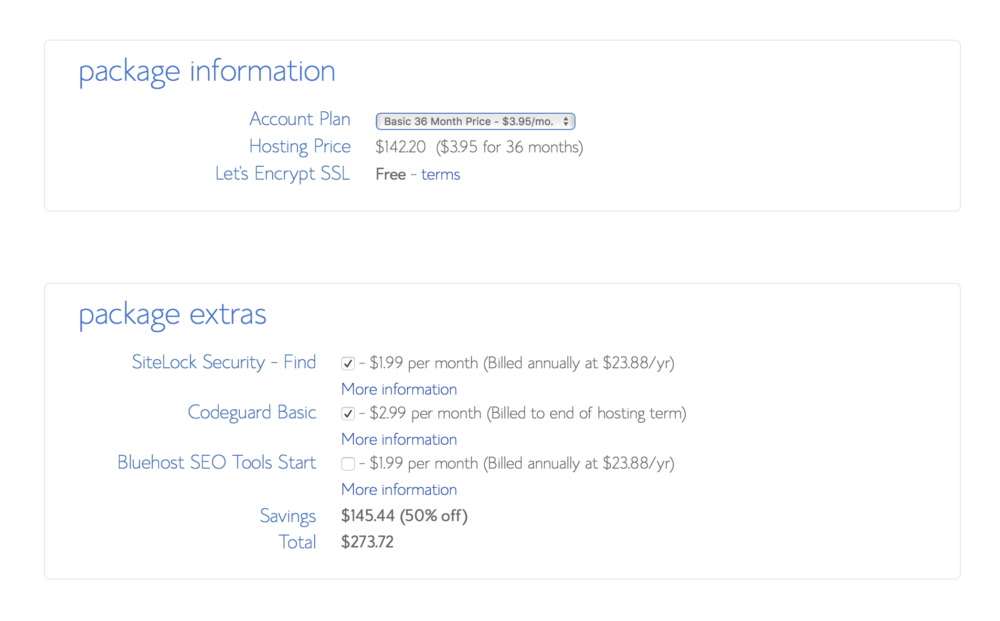
Pick the term length you want. Then choose the package extras that you want. If you do the basic you likely don’t need these right now. If you do the “Prime” plan you will get the domain privacy and that is all you really need to get started.
5 Enter Payment
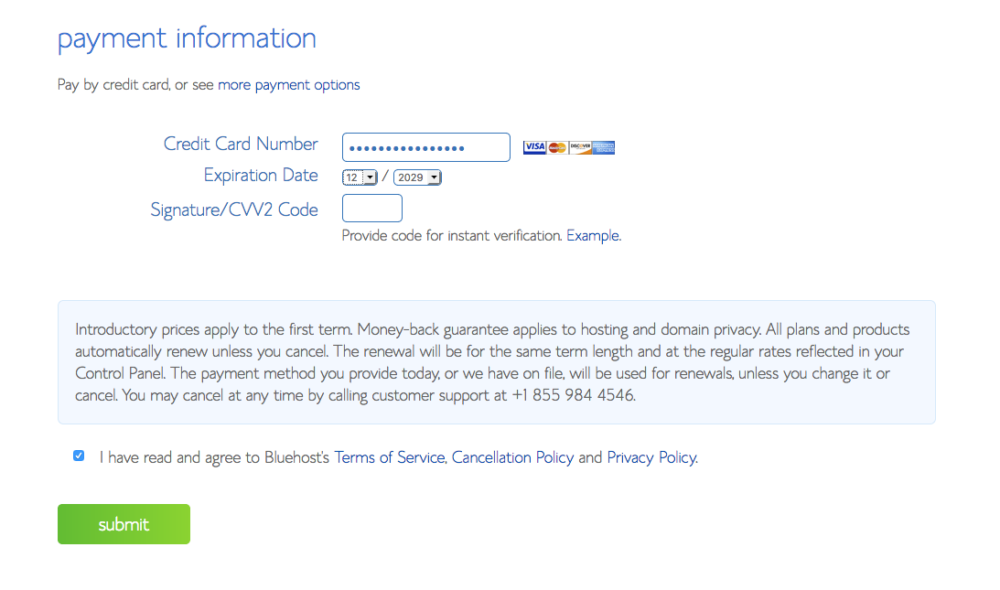
Enter your credit card info, check to agree to the Bluehost terms and click submit.
6 Create Password

You will be directed to create a password. Click the create password button and you will go to the next page to create it
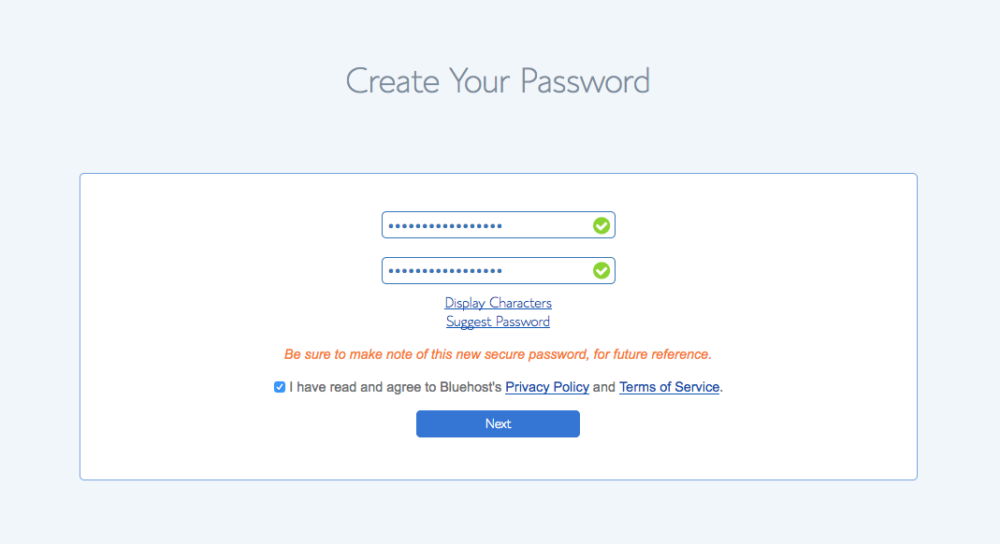
You can create your own or you can have one suggested for you. Check the box to agree to the terms and click next.
7 Login
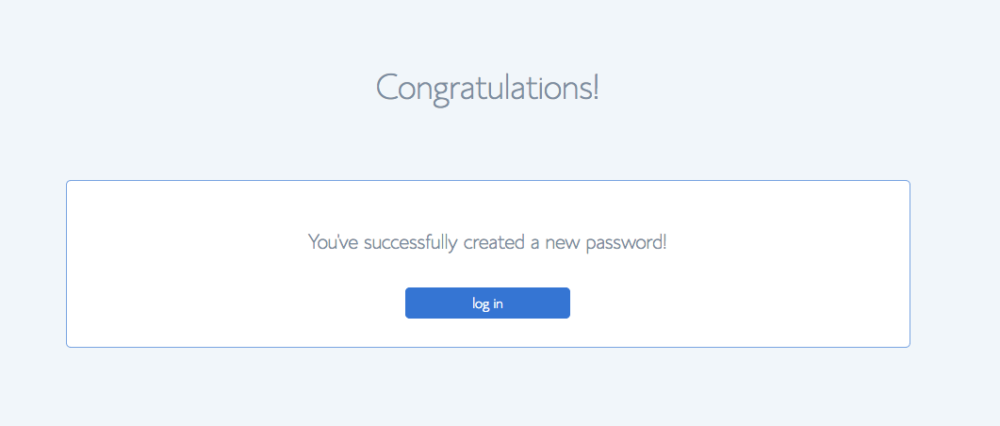
After making the password you will go to the Congratulations page with a button to login. Click it and login.
8 Install WordPress & Pick your theme
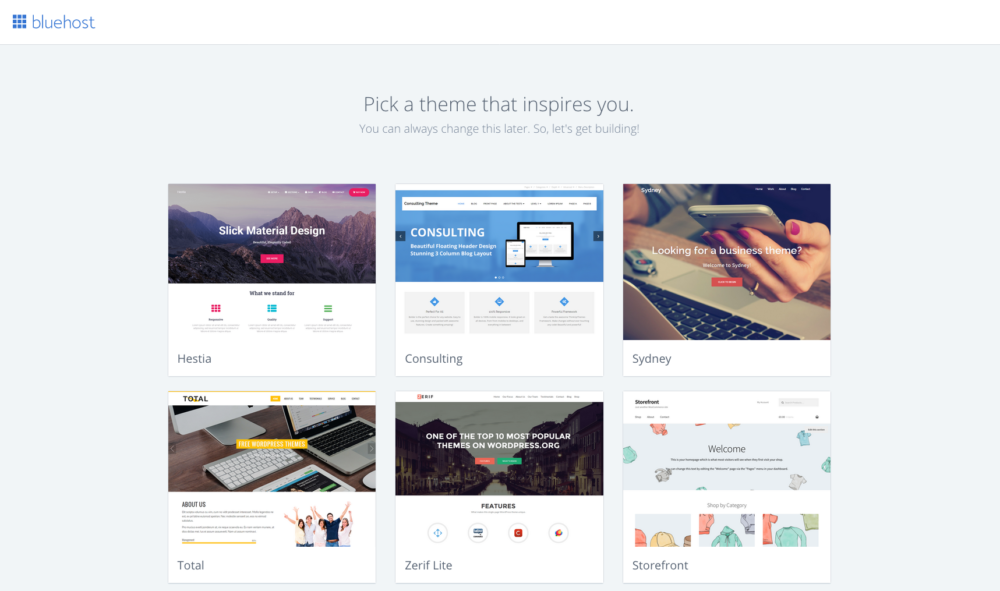
You can choose to pick a theme now or you can scroll down and click skip this step. Even if you pick one now, don’t worry you can always change it.
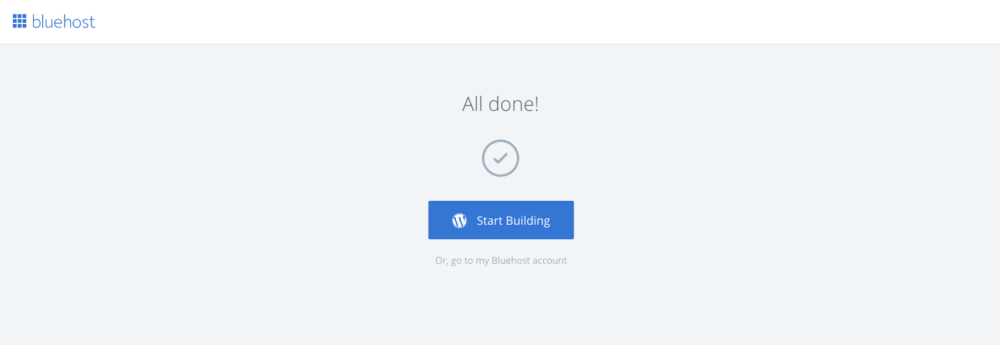
If you choose a theme or choose to skip this step you will go onto the page to click start building. This will take you to what is called the “back end”. This is where all the magic happens to make your site look the way you want.
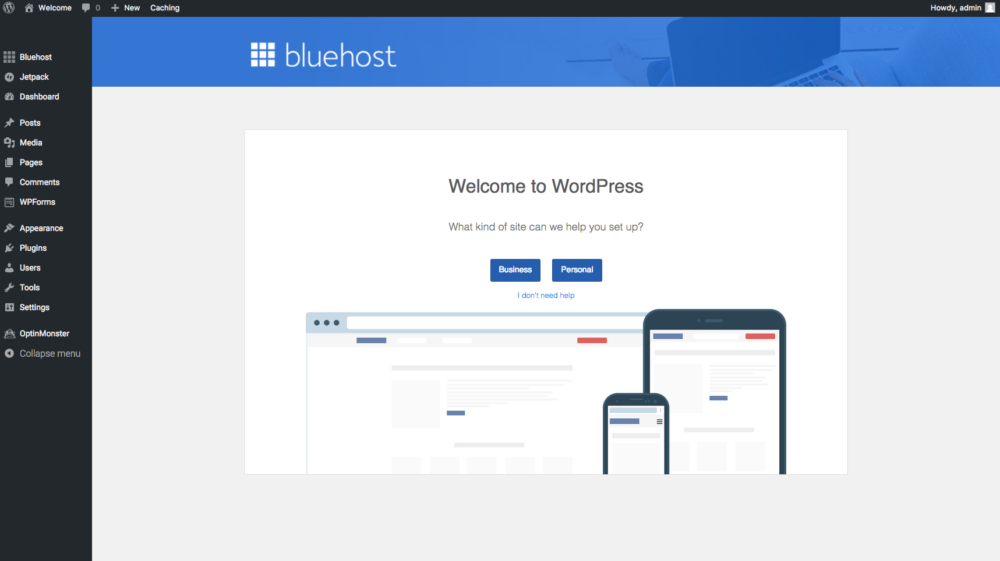
Here you can choose business or personal or “I don’t need help”. If you choose business or personal it will walk you through the set up. It is up to you on what you want to do.
Congrats! Now you have a WordPress Blogand you are ready to start.
Tips You Should Know
Log into WordPress
In order to log into your site to do anything to it you will need to go to your site with wp-admin after it. For example: http://www.yourwebsite.com/wp-admin. This will get you to be able to customize, add posts, etc.
DNS Nameservers
If you didn’t get your domain through Bluehost you will need to manage the Nameservers. It will be a little different depending on which company you got it through, but it is basically the same.
- You will log into the account for the domain.
- Look for where you manage domains.
- Once there you will look to set the nameservers.
- You will set the nameservers to be ns1.bluehost.com; ns2.bluehost.com.
- If you have problems you can contact you the company that you got your domain through.
- Note: If you have changed the nameservers and you try to go to your site and it doesn’t show it is likely due to your site not being launched. If you go back to your WordPress account and login at the upper left panel there is a Bluehost option. Click that and it will take you to a page that will allow you to launch the site.
Settings
In WordPress, you will go to settings on the left panel and select general. From this page, you will update the site title, tagline, and email address.
After you have launched your site you will go back to general settings and change the WordPress Address (URL) and Site Address (URL) to your site. For example: http://www.yourwebsite.com from the one that shows with temp in it.
Go to settings again and select permalinks. You will want to choose “Post Name”. This is so that when you make a post that it will put the post name after your domain to find the post instead of the date.
Basic Site security
Change user name from admin. Keeping admin makes it easy for people to hack your site. Yes, there are people who will try to hack your site.
To fix this you will go to Users on the left side panel and choose “add new”. Once on that page you will fill in your new user name, email, name and be sure to choose admin for the Role.
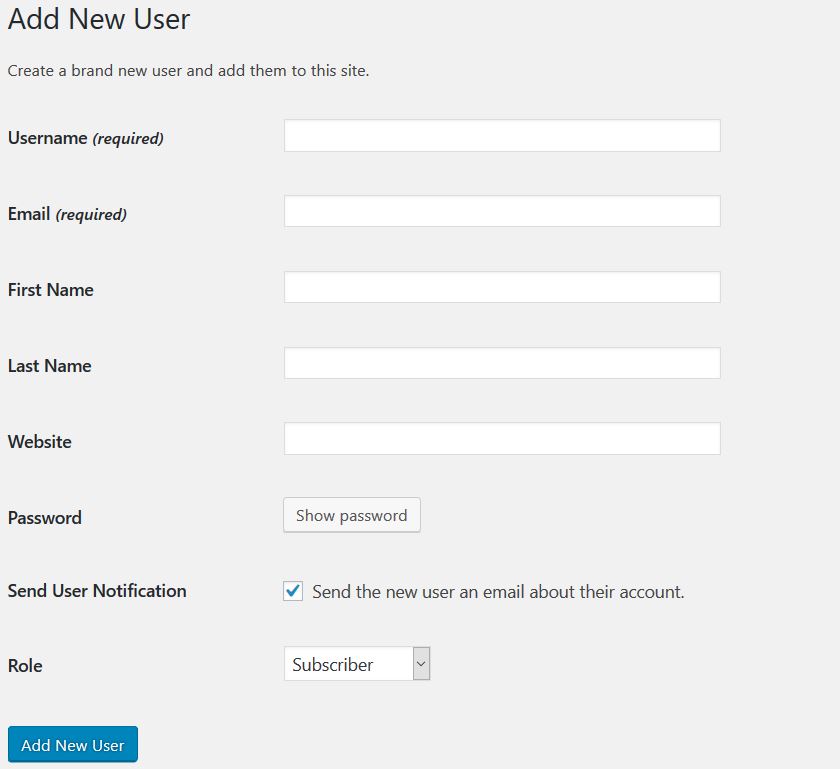
After you do that you will log out. Go to your email and get the new password for the account you just setup. You will log back in for the new account.
Go back to the user section, check the admin user and delete. Since that was the main user it will ask you what should be done with the content and you will want to attribute it to the new user name.
Selecting a Theme
Don’t stress about this. There are a ton of options and you could spend forever trying to pick the best one. Keep this in mind, you will change your theme. You will likely change it many times so don’t waste too much time on it.
To pick a theme you can go to Appearance on the left panel and select themes. From there, there are a ton of choices. You could leave it on the default or pick another one that stands out to you.
If you want to get something more specialized you can get a Genesis framework theme from Studiopress. The Genesis framework will allow you to change the theme that runs on it. I personally love the way that it functions.
Customize your pages
In order to add things to the side bar, header, or footer you will need to go to Appearance and the widgets to make it the way that you want.
Keep in Contact with Your Readers
If you want to send your readers emails or newsletters or just grow your list to build up clientele you will need an email service. To get started you could use a basic service like Mailchimp.
I personally use Convertkit. I suggest that if you are going to take this seriously you should start with
Now it’s your turn. You can do this. Getting a WordPress blog on Bluehost is easy. I swear. It may seem overwhelming, but follow these steps and you can have the foundation of your blog in just 20 minutes.
